 As a professional welder, it is very important to maintain your welding tools. After the welding tip breakdown, the second biggest problem that occurs is the mig weld liner. As the mig weld liner doesn’t work accurately when it gets dirty, we are here to tell you how to clean a mig weld liner.
Everyone knows how important a mig welding liner is! Mig weld liner plays a very important role in all types of welding tasks. If the mig welding liner does not work accurately then you are going to get lousy welds which is disappointing. So, you should ensure proper maintenance for your mig welding tools by cleaning the mig welding liner with our following steps.
Table of Contents
What Is A Mig Welder Liner? – How Does Mig Weld Liner Get Dirty?
Many welders hardly have an idea when and why the welder line becomes dirty. And if you are a beginner welder, you have to make sure that you know every inch of welding.
So, whoever wants to have a successful welding touch in every project, he must have to know what a welder is, and how to use it.
Let’s know all about mig Welder liner!
Mig Weld Liner:
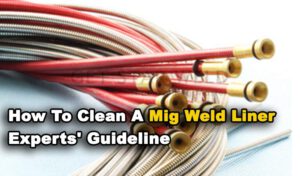
Before going through any complicated topics, you should know what a mig weld liner is and how it gets dirty. Mig weld liners are specially designed liners to connect the wire from the feeder gun to the contact tip properly. Liners ensure a smooth connection between one part of the gun to another.
They guide the whole route for the wire so you need to make sure that they stay along the accurate path. If the mig weld liner fails to connect the wire accurately then it would lead to improper welds.
How Does It Get Dirty?
Mig weld liners are designed with a balance of flexibility and rigidity. If you let this balance fluctuate then it will make your liner wire feeds get weakened. This happens when you bend your liner continuously and misplace it too often. These tight bends create increased friction between the wire and the liner. So that increased wide area around the wire gets dirty.
If you just avoid bending your mig weld liner then it would still get dirty. Regular dirt that enters along with the wire can also jam the whole liner at some point. You can prevent this dirt by being proactive and regularly cleaning the liner.
How To Clean A Mig Welder Liner- Steps & Guidelines
Here is the most effective and easy process you can use for cleaning your mig weld liner:
1. Unscrewing The Liner Nut
Before removing the liner for cleaning, you would also need to remove the welding tip and the gun from the liner. Firstly remove the welding wire and then remove the welding tip. Most of these mig weld liners come with a spanner which is used for unscrewing the nut. If you are done with removing the nut then you can now remove the liner from the gun.
2. Blowing Out The Liner & Clean It
Blowing air with an air compressor inside the liner is the most common way of cleaning the dirt. You can use a can of compressed air and burst it inside the liner. This process will remove all types of dirt and metal particles that are blocked inside the liner. It is an easy task as you are pushing air from one part of the liner and it is coming out with all the dust from the other part.
3. Find Out If The Liner Has Any Issues
Once you have cleaned the welding liner, it is time to check if it still has any problem or not. It is a wise decision to check for problems before reinstalling the liner. Check for kinks and you can also check by feeding the wire through the machine anytime you want. The liner can be faulty if it has any leaks of the torn apart metal fragments that have created too much damage. You will notice these small changes and damages pretty easily.
4. Put The Cleaned Liner Back In The Lead
If you don’t find any major issues after cleaning the liner then you can put it back in the lead. You have to be very careful as you must make sure that you do not kink when you are putting it back on the gun.
Keep the gun itself and the liner straight while connecting them to avoid any types of kinks and bendings. Now slowly push the liner inside. Once the liner is inside, screw the nut and put on the spanner back in their place. Now your liner is secured and ready to weld again.
5. Replace The Liner (If It Has Any Issues)
If you find any issues or if your liner is already doomed then you must replace it. You may also need to replace the liner if it gets any kink while you are putting it back in its place. You need to choose a suitable liner for your mig welder and then install it again properly.
To ensure a proper installation, you can buy some tools that would ensure no errors this time. There are some diffusers which would help to put the liner back in a completely straight position and ensure no gaps while connecting the power PIM and the contact tip.
Why You Should Clean Your Mig Weld Liner:
You should clean your mig weld liner regularly otherwise it would block the whole wireline and create wire feed problems. Other problems like bird nests would also occur because of the inaccurate wire lining of your weld liner if it is dirty.
Accumulation of metal fragments due to dirt can also damage the welding liner by tearing apart. This would also create a big blockage in your mig welding liner. All these problems can be solved only if you try to prevent it. And the prevention method is cleaning your mig weld liner regularly. Thus, you must clean it for the proper maintenance of the machine.
Final Words
Mig weld liners’ proper performance is very much important for a pleasing weld. You can not ensure this magnificence unless you ensure accurate working balance by cleaning or changing the mig weld liner when needed. When the mig weld liner drags or kinks due to dirt, your welding tasks can get damaged. So you should clean your mig weld liner or select a suitable new liner if the old one is damaged.