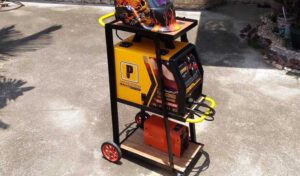
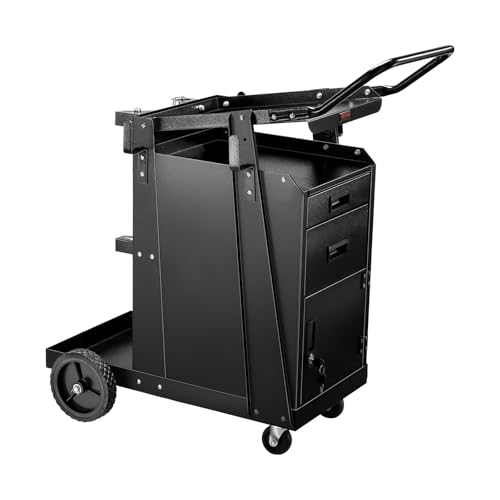
 You will always feel the need for a welding cart in your garage if you are working on a welding project. You would continuously need to carry lots of heavy and sensitive welding tools from here to there.
At this point, an idea might come to your head about how to build a welding cart by yourself. This creative thought is of great use if you work it out. You can build the perfect size cart if you ate designing it yourself.
Besides, building a welding cart will also be of great practice for your upcoming welding works. You will practice some basic cutting, welding, and tacking skills within this procedure.
Table of Contents
Steps By Steps Process For Building Your Welding Cart At Home
Since you haven’t built a welding cart or something or something like that before so, it will be hard for you to make one perfectly. But here are the one by one tip you can follow as we have the complete guideline briefed here.
Collect Materials You Would Need To Build A Welding Cart
The most strong and sturdy material for a welding cart would be iron/metal rods. You can use steel rods or old metal bed frames as they are strong enough to hold heavy weight welding tools. You would also need some wooden pallets to use as shelves. The small materials needed are rivet head, hammer, cut off disk, etc.
Mark The Materials For Cutting
For the welding tools and the gas bottle you have, you have to measure a perfect size holder and trays before cutting the metals. Use angel irons to build shelves where you should make at least two shelves for better capacity.
You have to measure the size and line up a mark in the metal angels with a paint pen. Use angel grinders for a better outcome when cutting these hard metals as they do not respond much too hard pressures.
Cutting
Put the clamped metal pieces in a solid table or smooth surface. You can cut these metals accordingly with many tools. The best metal cutting formula would be using a metal cutting chop saw with an abrasive disk as we have experienced these to work the best on smoothly cutting angel metals. Though the cuts won’t be so precise you can use handheld grinders as its solution
Cleaning Up The Cut Surface
After cutting the metals, you will feel the surface to be very rough the old paints will devalue its smoothness more. Use a bench grinder at this point for smoothness and cutting accuracy. Clean up the old paints by using a wire wheel on the grinder.
Lay Out & Fine Tuning
Layout the metals shafts and try to adjust them in a square position. If they do not match perfectly then you will have to do some fine-tuning in the corners with a bench grinder. Remember to keep turning them until they perfectly fit in otherwise, they won’t be strong enough to hold heavy tools.
Tacking & Welding
Flip the whole weld frame upside down and tack all four corners. You have to use a small tack. Tack deeply by continuously forcing with a hammer but don’t put the excessive force at once otherwise you might it will damage the frame itself. Build two frames in the previous procedure as you would need at least two shelves.
Measuring Vertical Frame Pieces
Now that you have constructed both frames, you have to measure them vertically and mark 90° angel cuts to complete the whole frame. You will have to cut new angel metals and tack them in a 90° angel to adjust both frames together.
Tacking Up The Whole Frame
Tacking up is going to be the first stage of durability for your welding cart. You have to tack up the whole cart frame starting from the bottom vertical frame angels, to the top vertical frame angels.
You can use magnets to temporarily stabilize the frame while tacking up. Only tacking is still going to be weak enough to break down easily so, you must tweak and bend the tacks for a better outcome
Welding The Whole Frame
After tacking up you have to weld the whole frame not just from outside but from the inside also. Many people do the mistake of welding from one side only which makes them repent right after they assemble it. So, make sure to weld both sides.
Welding Axle To Frame
Axles are to be used for attaching wheels to the cart. Use axle rods in the measured size of the wheels you have and weld them in place. Make sure to fill every gap of this round rod when welding or it might not stand with durability.
You can use washers with a pair of pliers for by welding them with the frame and putting the axle in between them for more wheel strength.
Installing/Welding Handlebar To The Frame
Use three rods and weld them like a handle where you will hold the long one as a handle. The other two rods will be used to attach the handle with the cart. You have to attach them by welding them together as you did with the whole frame.
Painting The Welding Carts Frame
For smoothness of the welding carts surface, clean up the whole cart and put a layer of primer paint, and let it dry. After that, use two/three layers of spray paint of any color you want.
Adding Shelf Boards In The Welding Cart
We have used angeled metals for this purpose. Now you can put two wooden pallets in the frame as two shelves. You have to cut the woods according to the frame size and adjust then by tacking or using glue. You can cut a round hole in the top shelf use it as a cylinder bottle holder.
Installing Wheels In The Welding Cart
Use big rubber back wheels and attach them by some washers for comfort in moving the cart in sturdy places. The front castor moving wheels should be installed with bolts in the front of the frame.
Conclusion
We have enlisted the whole procedure of how to build a welding cart. Using these steps you can easily build one for you. Don’t forget to use safety equipment while cutting and welding metals for building your welding cart at home.


